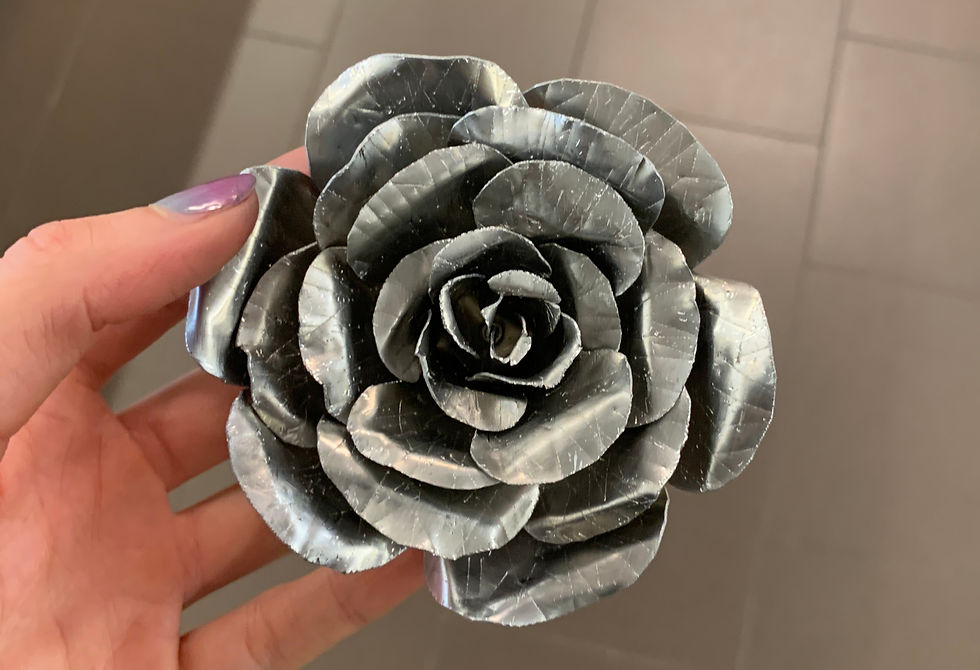
Sheet Metal Rose
- maggied6
- Aug 6, 2024
- 4 min read
Passionate and elegant but made of strong stuff.
My grandma loves roses. She has a giant garden full of flowers and I'd always help her plant and weed. When I was deciding what I wanted to do for the week's project, I thought of her and decided to see if I could plant a flower in the machine shop.
Tools used: SolidWorks, shearing machine, Water Jet, ban saw, deburring tools, pliers, mallet, chisel
Here's a peek at the final product!

Drawing the Project on SolidWorks
I got to the shop with paper cutouts of what I wanted the flower shapes to be, but I found that cutting the sheet metal would be very difficult by hand. So, instead, I drew each of the flowers on SolidWorks, in which the file could be uploaded to the Water Jet to cut the metal mechanically. I had to decide how I would connect the flowers, so I measured the size of a small screw as the center of each of the flowers. It was tedious to draw the flowers, because I wanted each petal to be round and relatively the same size, so this step ended up taking me a long time. I had to consider what lines I wanted to be cut, so I got rid of the center circle afterwards to then there wouldn't be a hole in my flower of the larger circle.

Optimizing Material Space and Water Jet
To use the least amount of sheet metal possible, I pieced each of the flowers close together into a rectangle. I took those measurements and cut a large sheet of sheet metal to size using the Shearing Machine, and then took my metal and flash drive to the water jet. Since the lines to divide the petals would be more difficult for the jet to cut, I also deleted the petal dividers. Once uploaded, we picked the easiest path for the water jet to cut, and with piece finished, we paused the machine and took out each part so that they wouldn't get in the way of the laser.

Deburring and Cutting
First, I cut the petal dividing lines on the Band saw so I could later bend the petals up. The Water Jet cut the pieces but left them very sharp, especially the 5 star piece, so I used sandpaper, deburring tools, and the polishing machine to make sure none of the edges of the petals would cut someone if they held the flower. I also polished off the markings on the flowers so there were no sharpie marks.

Learned I had to be careful
When I was trying to debur the edge of one of the middle flowers, I bent the piece up too much from the center, so a petal fell off. Luckily, this was a middle flower, so it wasn't noticeable, but this warned me to be gentle with my project.

Detailing
To make the pieces more realistic, I got a chisel and mallet and made patterns in each of the flowers and veins in the stem. In hitting the pieces with the mallet, they also very conveniently started to curve upwards, which helped with the shape of the flower.

Assembly
Since I made a small hole in the center of the flowers in the water jet, I now put in each of the petals in with the smallest going in first. As pictured, I started to bend the middle piece in to make the middle bud of the rose, but I found it difficult to hold and the sheet metal was tough.

Clamping the Flower
I used a wire as a makeshift stem to hold my flower in the clamp by wedging the wire between the screw and nut. I was in the shop fully, so I did not have my phone out for safety reasons, but at this stage I then used two pliers and slowly shaped each of the petals. As first, I simply bent all of the petals up. But I wanted the flower to look more realistic and like it was blooming. So, I unbent all of the petals back down and slowly got used to bending the petals concaved upwards but bending only the tip down.

Side View
It was a challenge learning how to shape the metal with just the two pliers, but it was very exciting to see the rose come into bloom. Something I would have done differently at this point is to be more patient at the beginning to making sure that the center of the flower looked good, as once I got to the edges it was very difficult to fix the center and I ended up ripping some of the edges of the center, which makes some parts of the flower pointy.

Bottom of Flower and finishing
I was going to put a wire stem on the bottom of the flower, but I decided I liked it without a stem, so I screwed up the nut and then superglued the bottom of the flower.

Finished Product!
I loved this project. It was so satisfying to create something so beautiful that started out as a sheet of metal. It was the same feeling of going from a blank painting canvas to a portrait. Tons of fun!


Comments